Emergency dental stabilization is the critical first step you take when a traumatic injury leaves a tooth cracked, loosened, or knocked out. Acting quickly to secure or protect the damaged tooth helps preserve the periodontal ligament, prevent infection, and improve your chances of saving the natural tooth. In this article, you’ll learn what emergency dental stabilization entails, how to handle different injuries at home, and when to seek professional care to ensure the best outcome for your smile.
Understand dental trauma
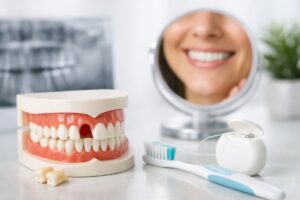
Dental trauma covers a range of injuries, from minor chips to complete avulsion of a tooth. Knowing the type of trauma you’re facing helps you respond appropriately.
Types of injuries
-
Avulsed tooth
A tooth that has been completely displaced from its socket. Immediate reimplantation or proper storage is vital. -
Luxation injuries
Teeth that are loosened or partially displaced. These require stabilization to prevent further damage to the periodontal ligament. -
Fractures and cracks
Ranging from small enamel chips to complicated crown-root fractures, these injuries can expose pulp tissue and allow bacteria to enter. -
Soft tissue trauma
Injuries to gums, lips, or cheeks often accompany dental injuries. Controlling bleeding and preventing infection are priorities.
Signs you need stabilization
- Severe tooth mobility or displacement
- Visible fracture lines or exposed pulp
- Uncontrolled bleeding around the tooth
- Intense pain that does not subside with home care
Identifying the signs of trauma helps you decide on immediate actions, including home stabilization and when to call an emergency dentist.
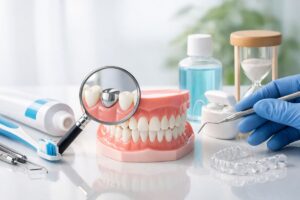
Define emergency stabilization
Emergency dental stabilization aims to protect the injured tooth and its supporting tissues until you can receive definitive treatment. The two main goals are:
- Preserve tooth vitality
- Prevent bacterial contamination
Timing matters—a tooth avulsion should be managed within an hour to maximize success. In cases of luxation or fracture, prompt splinting or bandaging reduces the risk of tooth loss or root resorption.
Take immediate actions
While waiting for professional care, you can take steps to stabilize the tooth and manage pain.
Handling a knocked-out tooth
- Retrieve the tooth by the crown only, avoid touching the root.
- Rinse gently under cold water, do not scrub off tissue.
- Attempt to reinsert into the socket if possible.
- If reinsertion fails, store in milk, saliva, or a commercial storage medium like Save-a-Tooth® [1].
- Seek care within 60 minutes for the best chance of reattachment.
For more details on professional support, see stabilize knocked out tooth.
Managing a chipped or fractured tooth
- Rinse your mouth with warm water.
- Apply a cold compress to reduce swelling.
- Cover sharp edges with dental wax or sugar-free gum as a temporary measure [2].
- Take over-the-counter ibuprofen or acetaminophen for pain relief.
If you need same-day cosmetic repair, explore repair chipped tooth same day.
Securing a loose tooth
- Gently bite on a wet gauze pad to stabilize the tooth in its socket.
- Avoid chewing on the injured side.
- Contact an emergency dentist promptly; delaying stabilization raises the chance of tooth loss.
Find a specialist at loose tooth stabilization dentist.
Temporary relief for lost restorations
- Place a lost crown back on the tooth without forcing, use denture adhesive or toothpaste to hold in place.
- Cover exposed cavities with over-the-counter dental sealant or sugar-free gum [2].
For urgent crown solutions, see temporary crown after trauma.
Apply professional splints
Emergency departments and dentists use splinting and bandaging methods to immobilize injured teeth. A randomized crossover study compared three splint techniques for avulsed teeth and two bandaging approaches for fractures [3].
| Splint method | Median time | Dentist preference |
|---|---|---|
| Periodontal pack | 4.4 minutes | 4% |
| Wire and composite splint | 8.6 minutes | – |
| Bondable reinforcement ribbon | 8.9 minutes | 96% |
| Bandaging method | Median time | Dentist preference |
|---|---|---|
| Calcium hydroxide paste | 4.6 minutes | – |
| Light-cured composite | 7.1 minutes | 100% |
Dentist evaluators preferred bondable reinforcement ribbon for avulsed teeth and light-cured composite for fractured teeth, citing higher quality stabilization. You can learn more about advanced methods in tooth splinting emergency.
Common splint options
- Periodontal pack splinting
- Wire and composite dental splint
- Bondable reinforcement ribbon splint
- Alternative methods using mask wires when kits are unavailable [4]
Use temporary restorations
After stabilizing the tooth, temporary restorations protect it until permanent treatment.
Temporary crowns
A provisional crown shields exposed dentin and prevents shifting. Dentists may use preformed crowns or laboratory-made temporaries. In cases of a lost or damaged crown, you can seek emergency crown replacement or temporary dental crown urgent.
Dental bonding
Bonding restores small chips and cracks with composite resin. It’s minimally invasive and can be done immediately in many practices. For on-the-spot repairs, check dental bonding emergency repair.
Repairing fractures and fillings
- For fractured teeth, a dentist can build up the tooth with composite and reshape it during emergency visits [1].
- Lost fillings can be temporarily covered using dental cement or over-the-counter sealant [2]; see broken filling emergency for more.
If you need immediate fracture repair, visit repair fractured tooth emergency or cracked tooth repair emergency.
Seek professional help
Emergency dental care offers focused expertise you won’t find in a general emergency room. Dentists use specialized kits and imaging to diagnose and stabilize trauma efficiently.
When to call an emergency dentist
- Avulsed or partially dislodged tooth
- Severe, unrelenting pain
- Signs of infection such as swelling or fever
- Post-extraction bleeding that does not stop
Emergency dentists can provide splinting, temporary restorations, and pain management quickly. If you’re unsure where to go, search for a tooth fracture repair clinic or urgent restorative dental repair near you.
Prevent further complications
Stabilizing the tooth promptly reduces risks such as pulp necrosis, root resorption, and infection.
-
Pulp necrosis
Occurs when nerves and blood vessels inside the tooth die, often requiring root canal therapy. -
Dry socket (alveolar osteitis)
A painful complication after extractions due to loss of the blood clot, treated with socket care and medicated dressings [5]. -
Deep space infections
Untreated abscesses can spread, causing life-threatening complications if not addressed promptly.
Following stabilization, maintain excellent oral hygiene, avoid chewing on the injured side, and attend all follow-up appointments.
Plan follow-up care
Emergency stabilization is only the first step. Your dentist will develop a treatment plan for definitive care:
- Radiographic evaluation
- Definitive splint removal (usually after 2 weeks)
- Pulp vitality testing
- Root canal treatment if needed
- Permanent restorations such as crowns or onlays
Consistent follow-up ensures long-term success. If you experience persistent pain, swelling, or mobility after stabilization, contact your dental provider immediately.
Emergency dental stabilization lays the foundation for saving teeth and preventing complications after trauma. By understanding injury types, taking swift home actions, using professional splints, and securing temporary restorations, you set the stage for a successful recovery. Always seek qualified dental care without delay to protect your oral health and smile.