Understand your emergency dental recovery plan
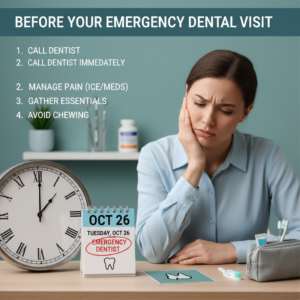
When you leave the dental office after urgent treatment, it’s crucial to follow a clear emergency dental recovery plan. This personalized roadmap outlines how to manage pain, reduce swelling, and protect the treatment site while you heal. By understanding each component—medication schedules, home care techniques, dietary adjustments, and follow-up appointments—you set yourself up for a smoother recovery and lower risk of complications.
Dental practices themselves prepare for crises using guidelines from the American Dental Association, ensuring offices have emergency protocols in place [1]. Your role begins when you get home. Adhering to the plan provided by your dentist or oral surgeon helps you control discomfort, support tissue repair, and prevent issues such as dry socket, infection, or prolonged bleeding.
An effective emergency dental recovery plan addresses both immediate needs—stopping bleeding, managing severe pain—and ongoing care, like maintaining oral hygiene without disturbing sutures or healing bone. In many cases, dental emergencies fall into three categories: traumatic injuries (fractures, avulsions), infectious problems (abscesses, pulpitis), and post-procedural complications (bleeding, alveolar osteitis) [2]. While your dentist handles treatment, you handle recovery by following clear, step-by-step guidance.
Keeping track of your plan in writing or on your phone makes it easy to reference dosing times, rinsing instructions, and warning signs that warrant further care. Many patients find that a simple checklist—covering pain medications, ice packs, soft foods, and follow-up scheduling—keeps them on track. As you move through each phase of your healing, you’ll transition from acute symptom relief to normal oral function with confidence.
Manage pain with medications
Pain management after dental emergencies is the backbone of your recovery strategy. Medications fall into two main categories: over-the-counter (OTC) analgesics and prescription pain relievers. Your dentist will recommend a regimen based on the intensity of your discomfort, any medical conditions you have, and other medications you’re taking.
Over-the-counter options
For mild to moderate pain, OTC drugs often suffice. Ibuprofen and naproxen are nonsteroidal anti-inflammatory drugs (NSAIDs) that reduce both pain and inflammation. Acetaminophen targets pain but does not have anti-inflammatory properties. In some cases, alternating ibuprofen and acetaminophen every few hours provides continuous relief.
Your dentist may suggest a dosing schedule like this:
| Medication | Typical dose | Notes |
|---|---|---|
| Ibuprofen | 200–400 mg every 4–6 hours | Take with food to protect your stomach |
| Naproxen | 220 mg every 8–12 hours | Provides longer relief, use as directed |
| Acetaminophen | 500–1000 mg every 6 hours | Do not exceed 3000 mg per day |
Always follow label instructions and your provider’s directions. If you have a history of ulcers, kidney issues, or take blood thinners, discuss OTC choices with your dentist or pharmacist before use. For detailed advice on medication timing and interactions, see our guide on post procedure dental pain meds.
Prescription pain relievers
When pain is more severe—such as after surgical extractions or treatment of facial trauma—your dentist may prescribe opioids or combination medications like hydrocodone with acetaminophen. Use these exactly as directed and for the shortest duration possible.
Key precautions for prescription pain relievers:
- Never mix opioids with alcohol or sedatives.
- Monitor for side effects like drowsiness or nausea.
- Taper off as pain diminishes to avoid dependency.
If your prescription does not adequately control your discomfort, or if you experience persistent nausea or other intolerable side effects, contact your provider promptly. Addressing pain proactively can reduce stress, improve sleep, and accelerate healing. For more pain relief strategies, explore dental pain relief after emergency.
Use home care strategies
Beyond medication, simple home care measures play a vital role in symptom relief and healing. Cold compresses, gentle rinses, and proper oral hygiene techniques all support the tissues affected by your dental emergency. Implement these methods diligently—small actions each day add up to big improvements.
Cold and warm compresses
In the first 24–48 hours after treatment, cold compresses help control swelling and numb the area. Apply an ice pack wrapped in a thin cloth for 10–15 minutes, then allow a 10-minute break before reapplying. This cycle reduces inflammation and eases discomfort around the jaw or cheek.
After swelling peaks—usually around day two or three—switch to warm compresses. A warm, damp towel applied for 10 minutes stimulates blood flow, promotes clearance of inflammatory byproducts, and soothes stiff muscles. Just avoid excessive heat that could irritate sutures or open wounds.
Oral hygiene and rinses
Maintaining oral hygiene is essential, but you must protect healing tissues. For the first 24 hours, avoid brushing near the treatment site. After that, gently clean the area with a soft-bristled toothbrush. Tilt the brush at a 45-degree angle to sweep away debris without scraping sutures or exposed bone.
Rinsing with a warm saltwater solution—half a teaspoon of salt in eight ounces of water—twice a day can ease pain, draw out debris, and inhibit bacterial growth. According to effective strategies for emergency dental care, saltwater rinses are a cornerstone of symptom relief and infection prevention [3]. Avoid vigorous swishing that might dislodge blood clots; instead, tilt your head side to side and let the liquid gently bathe the area.
For comprehensive home care instructions, refer to our emergency dental post op instructions and oral rinse & healing advice.
Adjust your diet safely
Food choices have a direct impact on your comfort and recovery speed. Your emergency dental recovery plan should include dietary recommendations that protect healing sites while ensuring adequate nutrition. As you progress, you can gradually reintroduce firmer foods.
Soft foods and hydration
Immediately after treatment, opt for soft, nutrient-dense foods that require minimal chewing. Good options include:
- Smooth soups and broths
- Yogurt, pudding, and applesauce
- Mashed potatoes or sweet potatoes
- Scrambled eggs or soft tofu
Staying hydrated is equally important. Water, herbal tea, and clear broths support tissue repair and help flush away bacteria. Aim for at least eight cups of fluid per day, avoiding hot or acidic beverages that might irritate open wounds.
Foods to avoid
Resume a normal diet only after your dentist confirms healing progress. Meanwhile, steer clear of:
- Hard or crunchy items like nuts and chips
- Sticky sweets such as caramel or chewing gum
- Seeds or small grains (they can lodge in sockets)
- Extremely hot or spicy dishes that cause discomfort
To protect new sutures or fragile tissue, cut food into small pieces and chew away from the treatment area. For a deeper dive into meal planning after urgent care, visit our diet after emergency dental procedure.
Schedule your follow-up visits
Follow-up appointments are a critical element of your emergency dental recovery plan. These visits let your dentist assess healing, remove sutures if needed, and address any emerging issues before they escalate. Neglecting follow-up care can lead to infection, persistent pain, or need for additional treatment.
Typical follow-up milestones include:
- Emergency dental follow up appointment – usually within 48–72 hours after the initial visit.
- Suture removal dental follow up – often scheduled 7–10 days post-procedure [4].
- Post emergency dental cleanup – if debris or clot issues persist, your dentist may perform a gentle cleaning a week later [5].
If you had specialized treatment—such as a root canal or crown placement—additional visits like after root canal follow up or after emergency crown care ensure that restorations fit correctly and the surrounding tissue remains healthy.
Even if you feel better, don’t skip these appointments. Your dentist will evaluate sites for silent complications such as early infection or delayed bone healing. Confirm dates before you leave the office, and set reminders on your phone or calendar.
Know when to seek further help
Most discomfort resolves within a week or two, but certain warning signs mean you should contact your dentist or seek emergency care immediately. According to the Cleveland Clinic, uncontrolled bleeding, severe pain unrelieved by medication, or broken facial bones require prompt evaluation [6].
Alert your dentist if you experience:
- Persistent bleeding more than 12 hours after treatment
- Pain that intensifies rather than improves
- A foul taste or smell at the site, suggesting infection
- Swelling that continues to grow beyond 48 hours
- Difficulty breathing or swallowing
In cases of high fever, rapid heart rate, or extensive facial swelling, go to the nearest emergency department. Your emergency dental recovery plan should include contact numbers for both your dental office and local urgent care or hospital. If you’re unsure, err on the side of caution—early intervention prevents complications from becoming serious.
Transitioning to routine care
Once acute symptoms subside, you move into the maintenance phase of your recovery plan. This involves regular brushing and flossing, periodic oral rinses, and attending routine checkups. If you received treatment for a chipped tooth or abscess, refer to follow up on chipped tooth repair or dental care after abscess treatment for specialized guidance.
Preventive education also bolsters long-term oral health. Wearing mouthguards during sports, avoiding hard foods that cause trauma, and keeping up with routine cleanings all reduce the chance of future dental emergencies. Your emergency dental recovery plan doesn’t end when pain stops—it evolves into a personalized roadmap for lasting dental wellness.
By understanding each step—medication management, home care, diet, follow-up scheduling, and knowing when to seek help—you empower yourself to heal efficiently and confidently. Stick to the plan, stay in close contact with your dental team, and you’ll navigate post-emergency recovery with minimal discomfort and maximum peace of mind.