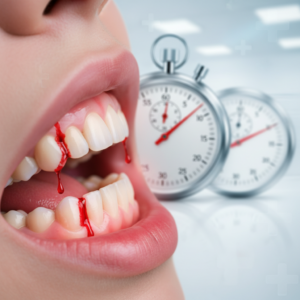
Causes of post-emergency pain
After an emergency dental event you may experience soreness, throbbing or sharp pain around the affected area. This discomfort often stems from inflamed tissues, exposed nerves or the trauma of the procedure itself. Common dental emergencies include severe toothaches, cracked or fractured teeth, knocked-out teeth, lost fillings or crowns, abscesses and soft tissue injuries in the mouth. Recognizing these situations can help you understand why you feel pain and guide you toward appropriate relief.
- Severe toothache
- Cracked or fractured tooth
- Knocked-out tooth
- Lost filling or crown
- Dental abscess
- Soft tissue injury in gums, lips or tongue
Such emergencies often require immediate attention to prevent complications. Knowing which issue caused your pain sets the stage for effective follow-up care and symptom relief.
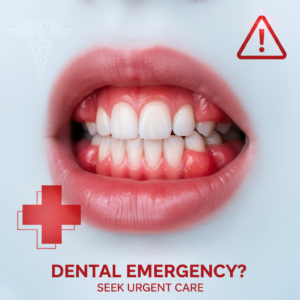
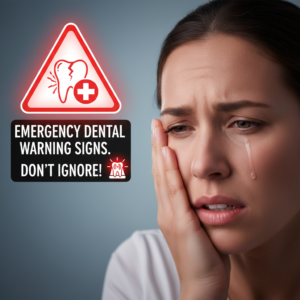
Recognizing emergency signs
Not all dental discomfort requires an emergency room visit, but certain red flags mean you should seek professional help right away. If you experience uncontrolled bleeding, difficulty breathing or swallowing, facial fractures, deep lacerations or fever with swelling, head to the nearest emergency department [1]. These life-threatening conditions go beyond what an emergency dentist can manage.
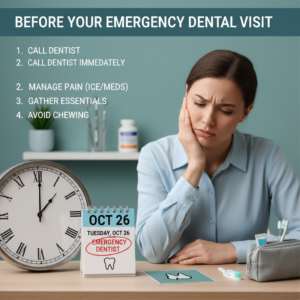
For severe toothache or dental abscess, start by rinsing your mouth thoroughly with warm water and gently removing food debris with dental floss. Apply a cold compress to the cheek for up to 10 minutes to curb swelling and pain. Then contact an emergency dentist for same-day care—delaying treatment increases your risk of infection and further complications. When in doubt, err on the side of caution and get professional evaluation.
Applying immediate relief techniques
Before you can make it to the dentist, several at-home tactics can ease your discomfort.
Start with a gentle rinse of warm salt water—mix a half teaspoon of salt into eight ounces of warm water and swish for 30 seconds to reduce inflammation and clear debris [2]. If you’re bleeding, place a clean piece of gauze or cotton over the site and bite down firmly for 10 to 15 minutes to help clotting [1].
Next, apply a cold compress or an ice pack wrapped in a thin towel to the outside of your cheek for up to 15 minutes. The cold constricts blood vessels, numbs nerve endings and slows inflammatory responses [3]. Repeat every few hours as needed.
Finally, keep your head elevated and avoid strenuous activity. Resting helps minimize blood pressure in the head and throat area, which can reduce throbbing pain. These simple techniques can bridge the gap until you receive definitive care.
Using over-the-counter medications
Over-the-counter (OTC) pain relievers are often your next line of defense. Nonsteroidal anti-inflammatory drugs (NSAIDs) like ibuprofen and naproxen tackle both pain and inflammation, while acetaminophen (Tylenol) addresses pain without the anti-inflammatory effect. You can also combine these medications for enhanced relief, following recommended dosages.
| Medication | Typical dose | Onset time | Key benefit |
|---|---|---|---|
| Ibuprofen | 200–400 mg every 4–6 h | 30–60 minutes | Reduces inflammation and pain |
| Naproxen | 220 mg every 8–12 h | 30–60 minutes | Longer-lasting anti-inflammatory effect |
| Acetaminophen | 325–650 mg every 4–6 h | 30–60 minutes | Pain relief, no stomach irritation |
You might follow the “3-3-3” rule: take pain meds every three hours, apply cold compress for three minutes, and repeat three times a day [4]. For severe post-procedure pain, a combination of 400 mg ibuprofen with 1 000 mg acetaminophen can outperform opioids in effectiveness [5]. Always adhere to the maximum daily limits and consider your overall health before combining medications. For more guidance, see our post procedure dental pain meds resource.
Trying natural home remedies
If you prefer natural options, several time-tested remedies can bring temporary relief. Clove oil contains eugenol, a natural anesthetic and antibacterial, which you can apply to the affected area after diluting with a carrier oil [2]. Use a cotton swab to target the sore spot, but limit application to a few times per day.
Warm saltwater rinses also ease discomfort by reducing swelling and drawing out infection [6]. Chewing a garlic clove or applying crushed garlic mixed with salt leverages allicin’s antibacterial properties, though you should rinse thoroughly afterward to avoid lingering odor [7]. Vanilla extract soaked on a cotton ball can numb pain and provides antioxidants to support healing [7].
While these home remedies can reduce your discomfort, they don’t replace professional evaluation and definitive treatment. Use them sparingly and follow up with your dentist as soon as possible.
Caring for dental procedures
Different emergency treatments come with unique aftercare needs. Tailoring your approach ensures smoother recovery and less pain.
For extractions, avoid vigorous rinsing in the first 24 hours to protect the clot. After that, gently rinse with warm saltwater and follow our healing care dental extraction instructions. Stick to soft foods and follow our diet after emergency dental procedure guidelines to minimize irritation.
If you’ve had a root canal, keep your mouth clean and attend your after root canal follow up appointment. Your dentist may prescribe a temporary crown—avoid chewing on that side until the permanent restoration is placed.
For abscess treatment, complete any prescribed antibiotics and adjust your oral hygiene according to our dental care after abscess treatment recommendations. After crown repair or placement, follow the after emergency crown care steps to prevent sensitivity and ensure proper seating.
When sutures are involved, plan for suture removal dental follow up about one week post-procedure. Always consult your dentist before resuming activities like flossing near the site, and review our emergency dental post op instructions for a full checklist of do’s and don’ts.
Planning follow-up visits
Scheduling timely follow-up visits keeps your recovery on track and lets your dentist catch potential issues early. Book an emergency dental follow-up appointment or a follow up emergency dental visit within 24 to 48 hours of your procedure. During that visit, your provider can assess healing, remove debris and perform a post emergency dental cleanup to lower infection risk.
If your emergency involved dental trauma, like a chipped or cracked tooth, arrange a follow up on chipped tooth repair. For comprehensive care after a serious incident, consider our emergency dental recovery clinic options or explore an emergency dental recovery plan tailored to your needs.
Consistent follow-up empowers you to stay ahead of pain flare-ups and makes sure any restorations hold up over time.
Preventing future pain episodes
Once you’ve healed, take steps to minimize the chance of another dental emergency or flare-up. Maintain a thorough oral hygiene routine with twice-daily brushing and daily flossing. Visit your dentist for regular cleanings and checkups, so small issues don’t become painful emergencies.
Avoid hard or sticky foods that can crack teeth or dislodge restorations. If you grind your teeth at night, ask about a custom night guard. Practice safe habits like wearing a mouthguard during sports and steering clear of chewing ice or nonfood items.
By combining preventive care with timely follow-up, you’ll reduce the risk of emergency dental pain and feel more confident in your oral health — setting you up for long-term comfort and wellness.